How to Add Custom Tokens
This guide explains how to add custom tokens to your wallet interface.
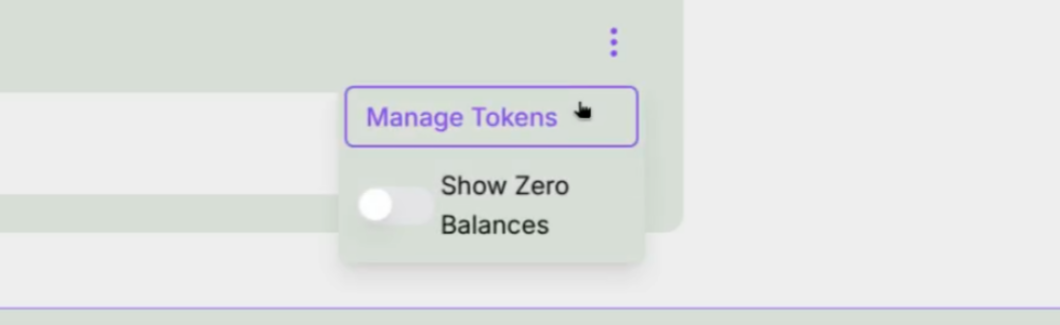
Step 1 — Open the Token Manager
Click on the three‑dot menu in the wallet and select Manage Tokens.
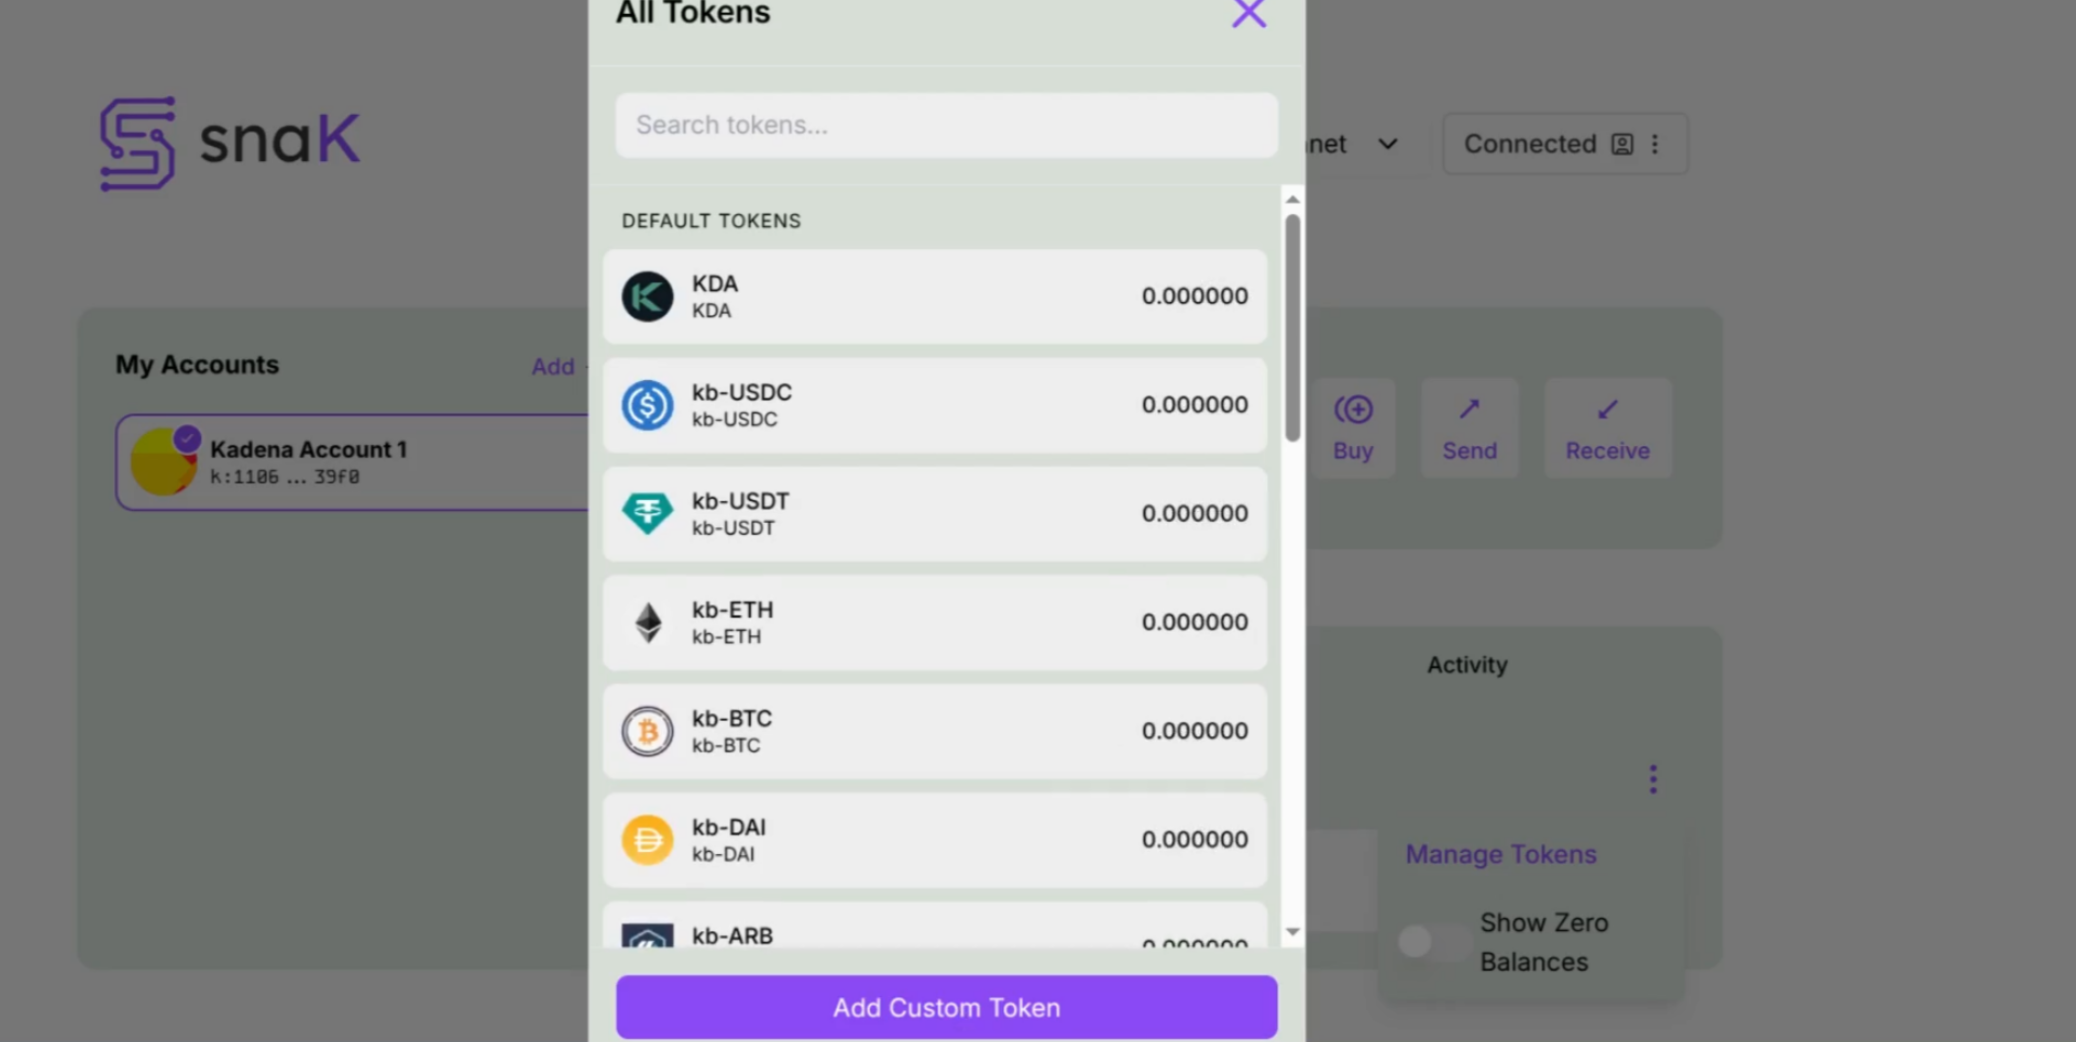
Step 2 — View the Token List
You will see the list of default tokens available in the wallet. At the bottom of this screen, click Add Custom Token.
Step 3 — Open the Add Token Dialog
A dialog will appear asking you to provide details about your token.
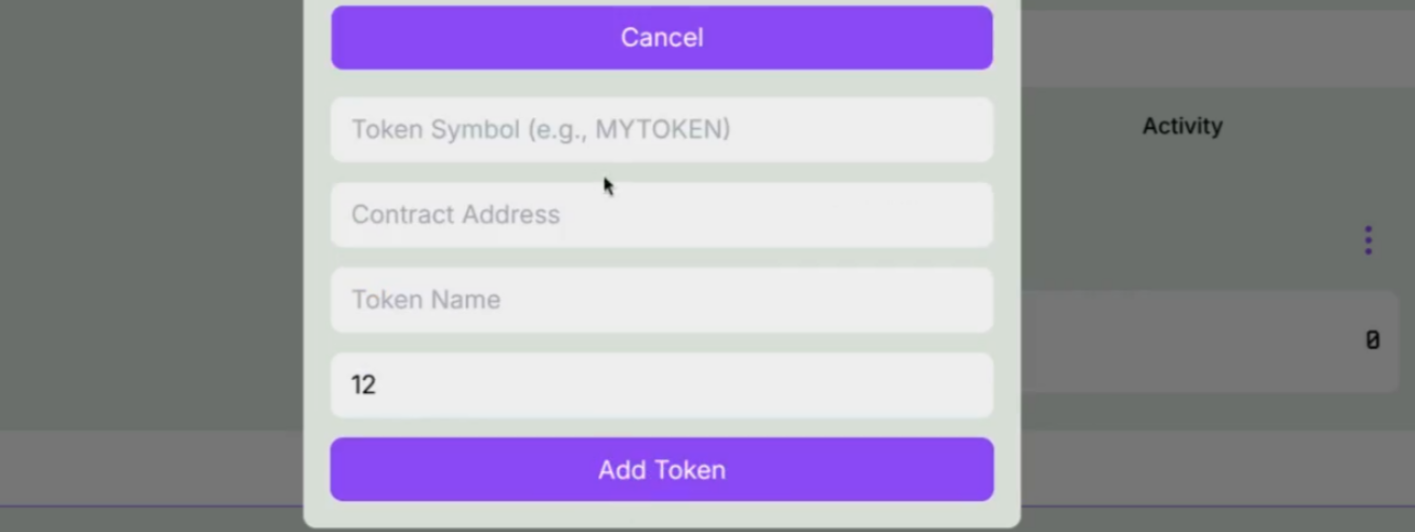
Step 4 — Fill in Token Information
Enter the following information:
- Token Symbol (e.g.,
MYTOKEN) - Contract Address (the token contract’s unique identifier)
- Token Name (readable name for the token)
- Decimals (the token’s precision, e.g., 12)
After filling in the fields, click Add Token.
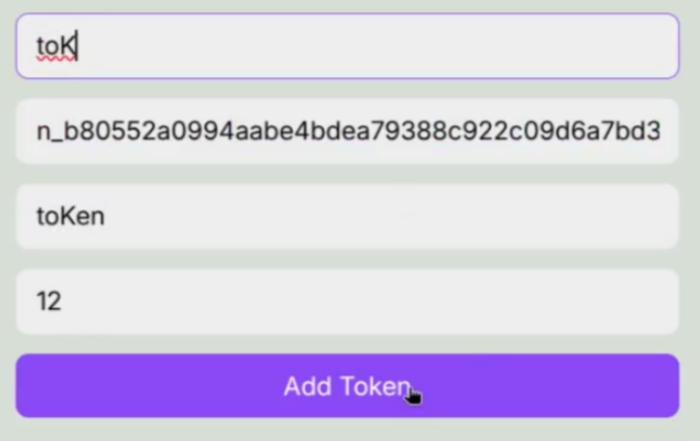
Example (as shown below):
- Token Symbol:
toK - Contract Address:
n_b80552a0994aabe4bdea79388c922c09d6a7bd35.tok - Token Name:
toKen - Decimals:
12
Done!
Your custom token will now appear in the wallet’s token list and can be selected when sending tokens.